
When your computer is starting up and faces problems with ‘Pre-Memory CPU Initialization,’ it can be frustrating. The good news is that by carefully checking and fixing things, you can often solve many of these issues.
The ‘Pre Memory CPU Initialization Is Started’ error suggests hardware or setup issues during the initial CPU configuration. To fix it, you’ll need to troubleshoot systematically.
This article will explore an important part of how a computer starts up, understanding why it’s crucial steps it takes.
Why Pre-Memory CPU Initialization Error Occurs?
Pre-Memory CPU Initialization errors can occur due to incompatible CPUs, faulty hardware connections, incorrect BIOS settings, damaged components, or issues with the CPU itself.
Troubleshooting involves checking hardware compatibility, verifying connections, adjusting BIOS settings, and inspecting for physical damage.
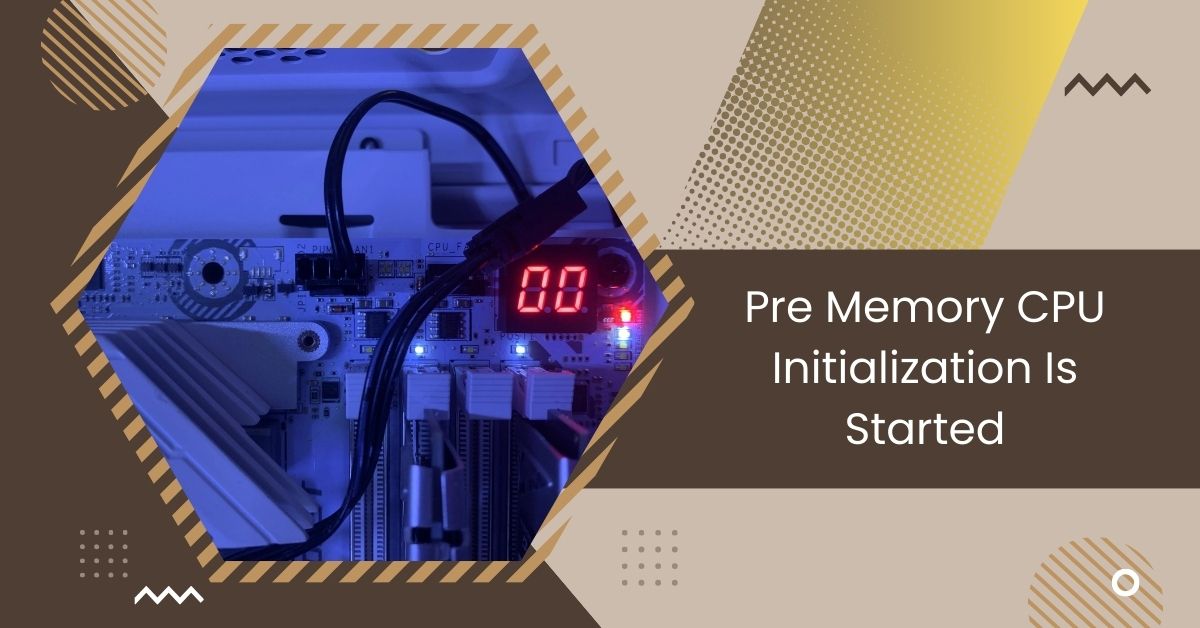
Pre-memory CPU Initialization Is Started
The message “Pre-memory CPU Initialization Is Started” indicates that the CPU is beginning its initialization process before accessing system memory during boot-up.
Fix #01 To Resolve Pre Memory CPU Initialization?
Step 1: Disable Overclocking:
Overclocking, while a tempting way to boost performance, can sometimes lead to system instability.
To resolve the initialization error, disable overclocking in your system’s settings. This ensures your CPU operates within stable parameters during startup.
Step 2: Reset The BIOS (CMOS Clear):
A misconfigured BIOS can contribute to the error. Reset the BIOS to default settings by performing a CMOS clear. This step wipes any custom settings, bringing your system back to a stable baseline.
Step 3: Minimal Configuration:

Strip your system down to the essentials. Disconnect unnecessary peripherals, leaving only the essential components connected. This minimal configuration helps identify if the error is related to a specific hardware component.
Step 4: Boot The PC:
Attempt to boot your computer after the minimal configuration. If the error persists, proceed to the next step. If not, gradually reintroduce components to pinpoint the culprit.
Step 5: Gradual Component Testing:
Check the CPU socket for bent pins, ensure RAM modules are seated correctly, and resolve any hardware conflicts. Unstable overclocking, incompatible BIOS/UEFI settings and software driver issues are common culprits.
Step 6: Full System Assembly:

Reassemble your system once you’ve identified and resolved the underlying issue. Ensure all components are correctly seated and connected. With these steps, your computer should now initialize without the “Pre Memory CPU Initialization” error.
Read: Env Node Bad CPU Type In Executable – Fix CPU Type Error!
Fix #02 To Resolve Pre Memory CPU Initialization?
Step 1: Probe Removal:
If your computer has trouble starting after adding a new device, try removing it. New additions can sometimes cause issues, and if your PC starts working fine without it, that might be the problem.
Step 2: Check The CPU Socket:
The CPU socket on your computer’s main part for any pins that are bent or broken. Bent pins can cause the computer to have trouble starting up.
If you see any bent pins, carefully try to straighten them using a gentle tool that isn’t made of metal.
Step 3: Memory Seating:
Check if your computer’s memory cards are in the right spots. If your computer has trouble starting up, sometimes just taking out the memory cards and putting them back in can help. Make sure the memory cards are pushed in all the way and firmly in place.
Step 4: CPU Cooler Inspection:

If you have a special cooling system, like a one-stage cooling unit, make sure it’s put in the right way and isn’t pressing too hard or causing problems with the part where the computer’s brain connects.
Step 5: Power Supply Connections:
Check if all the power cables, including the ones connected to the main computer part and the graphics part, are plugged in properly. If they’re not secure, the computer might have trouble starting up.
Read: CPU Ratio Offset When Running AVX – Optimize AVX Efficiency!
Step 6: Simplified Setup:
To find the problem:
- Start with a simple setup.
- Take out things you don’t need right now, like an extra graphics card, extra storage, and extra memory.
- Test with only the important things for starting up: the brain of the computer (CPU), a bit of memory, the graphics part, and the power connections.
Step 7: BIOS Reset:

If your computer’s main part has a button or a tiny tool to reset the settings, use it. This helps set everything back to the usual settings and can be useful if there’s a problem with how you added the new device.
Step 8: GPU Check:
If your computer’s main part has its graphics (iGPU), try starting up with the screen plugged into the computer’s video output. Doing this can help figure out if the problem is related to the graphics part.
Step 9: Monitor Input:
Make sure your screen is set to the right source (like HDMI or DisplayPort) and that the cable is working. Sometimes, problems with the screen can cause it not to show anything.
Read: Do You Need To Reinstall Windows After Replacing CPU – Guide
Fix #03 To Resolve Pre Memory CPU Initialization?
Step 1: Reseat the RAM:
Begin with the basics. Reseat your RAM to ensure a snug fit. This often resolves connectivity issues causing the initialization hiccup.
Step 2: Try a Single RAM Stick:
If you have more than one memory stick in your computer, try starting it up with just one stick in the main memory slot. If it doesn’t work, try each stick on its own to see if any of them might be causing the problem.
Step 3: Check For Loose Connections:

Check that all the power and data cables are firmly plugged into your computer’s main part, graphics part, and other pieces. Sometimes, if the connections are loose, it can make starting up the computer tricky.
Step 4: Inspect For Bent CPU Pins:
Take a close look at the part where your computer’s brain connects to the main part. See if any pins are bent or broken. If a pin is bent, it can cause problems when your computer is starting up.
Step 5: Test With Minimal Hardware:
Unplug any extra things connected to your computer, like extra storage and USB devices. Keep only the important stuff connected: the brain (CPU), a bit of memory, the graphics part, and the power.
Read: Will Bent CPU Pins Affect My Computer? – Fix Bent CPU Pins!
Step 6: Try A Different GPU Slot:
If your computer’s main part has more than one slot for the graphics part, try using a different slot. This might help fix the problem.
Step 7: Monitor Your PSU:

Even if your computer’s power supply was not strong enough at first, keep an eye on how well it’s working.
A power supply that’s not doing well can make things unstable. If you have another power supply you can use, try switching them for a bit to see if it helps.
Step 8: Inspect For Physical Damage:
Look closely at the main part of your computer for any obvious signs of damage, like burns or broken parts. Also, check out the graphics part.
Step 9: Check For BIOS Updates:
Go to the company’s website that made your computer’s main part and see if there are any updates for the BIOS. Sometimes, these updates can fix problems or make things work better.
Step 10: Contact Manufacturer Support:
If none of the things we tried before worked, think about reaching out to ASUS support or the people who made your other computer parts. They can give you special help and advice to figure out what’s going wrong.
Read: Corespotlightd High CPU – Boost Core Spotlight Performance!
The Significance of Pre-memory CPU Initialization
Pre-memory CPU initialization is crucial as it ensures proper functioning of the CPU before accessing system memory during the early stages of the boot process.
Error Code 15 pre memory system agent initialization is started?
Error Code 15 indicates that the pre-memory system agent initialization has begun. This suggests a problem during the early stages of the system boot-up process.
EXPO delays boot up by 1min with “Pre-memory System Agent initialization is started” but works fine after boot
EXPO experiences a one-minute delay during boot-up with the message “Pre-memory System Agent initialization is started,” but functions properly afterward.
Unable to initialize memory with z690 motherboards. Unable to boot to bios, stuck at Q-Code 11
Z690 motherboards encounter issues initializing memory, preventing BIOS boot-up. The system remains stuck at Q-Code 11, indicating a failure in the early boot process.
Read: Bad CPU Type In Executable Homebrew – Ultimate Guide In 2024
Fixed! – First Post – ASUS Crosshair VIII Q-code stops at 15
Issue resolved! ASUS Crosshair VIII Q-code now progresses past 15 during the first post, indicating successful initialization and potentially resolving boot-up problems.
Msi debug code 19, Early South bridge Initialization
MSI debug code 19 indicates an issue with Early South Bridge Initialization. This suggests a problem with the initialization process of the south bridge component.
Pre memory CPU initialization is started Windows 11
“Pre-memory CPU initialization is started” message indicates that the system is initializing the CPU before accessing memory. This is observed during the boot process in Windows 11.
motherboard error code list
Here’s a list of common motherboard error codes:
- Q-Code 11: Initialization error.
- Q-Code 15: Pre-memory System Agent initialization.
- Q-Code 19: Early South Bridge Initialization.
- Q-Code 20: Early North Bridge Initialization.
- Q-Code 55: Memory not installed.
PCH initialization after microcode loading
“PCH initialization after microcode loading” refers to the process where the Platform Controller Hub (PCH) initializes after loading microcode, typically observed during system boot-up.
Read: Why Is My CPU Not Being Utilized – Troubleshoot CPU Issues!
CPU post-memory initialization
“CPU post-memory initialization” refers to the stage where the CPU completes its initialization process after the system’s memory has been initialized, typically during boot-up.
How do I fix CPU post memory initialization?
To fix CPU post-memory initialization issues, try reseating the CPU, checking for bent pins, updating BIOS, resetting CMOS, or testing with known-good components.
What is code 14 on Asus x670e hero?
In ASUS X670E Hero motherboards, Q-Code 14 typically indicates that the system is currently in the process of preparing for memory initialization.
Key Takeaways
- Pre-memory CPU initialization begins the computer boot-up process.
- It includes checking and setting up vital CPU components and registers.
- This process is essential for the system to work correctly.
- Mistakes or issues during pre-memory CPU initialization may stop the computer from starting up.
- Completing initialization properly guarantees the system’s stability and reliability.
FAQs
1. How Do I Reset My CPU RAM?
To reset your CPU RAM, turn off your computer and unplug it. Wait for a few seconds, then plug it back in and turn it on. This helps clear any temporary issues in the computer’s memory.
2. What Does Reset CMOS Do?
Resetting CMOS sets the computer’s basic settings back to their default values. It can be useful if you’re having problems with your computer’s setup or if you’ve changed settings and want to go back to the original configuration.
3. How To Enable Both RAM In BIOS?
In the BIOS settings, look for an option related to memory or RAM. Ensure it’s set to recognize and use both RAM sticks. Save changes before exiting the BIOS.
4. Does Removing The CMOS Battery Reset BIOS?
Yes, removing the CMOS battery can reset the BIOS. It’s a way to clear the settings and start fresh. After removing the battery, wait for a few minutes before putting it back.
5. Misteria of the Old Computer Or Constantly Looping On Pre-memory north-bridge initialization is started
The mystery of the old computer: stuck in a constant loop with the message “Pre-memory north-bridge initialization is started,” indicating a persistent boot-up issue.
6. Maximus Gene VII Q Code 15 (Pre-memory System Agent initialization is started)
Maximus Gene VII displays Q Code 15, indicating that the pre-memory System Agent initialization has begun. This suggests the system is in the early stages of booting up.
Conclusion
Final Words,
when facing the “Pre Memory CPU Initialization” error, follow systematic troubleshooting steps like checking hardware and resetting BIOS settings. Seek support from ASUS or component manufacturers if issues persist for a smoother computer startup.
Also Read
- Process Lasso Error Setting Process CPU Affinity – Resolve!
- Fatal Glibc Error: CPU Does Not Support X86-64-V2 – Guide!

Hi everyone, Johns Jack here, your approachable tech aficionado! I’m passionate about CPUs and thrive on keeping up with the newest tech developments. Join me as we delve into the dynamic realm of technology! Visit: Techy Impacts